
To write SLM-7650 data to the hard disk of the computer will use a great controller CY7C68013A-56PVXC .
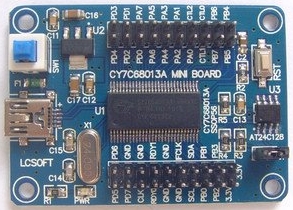
First we need to get two boards: first, containing the controller CY7C68013A
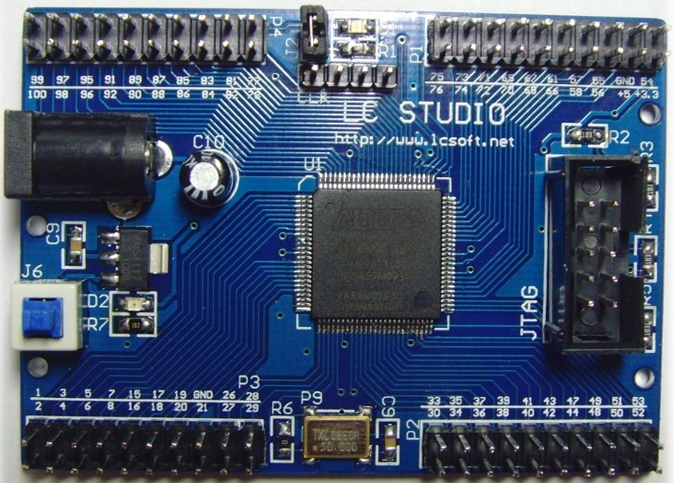
The second board is the FPGA EPM240T100C5N, which is needed to translate the serial data in parallel, and to generate the strobe entry.
Also to program the FPGA need programmer "USB-Blaster" 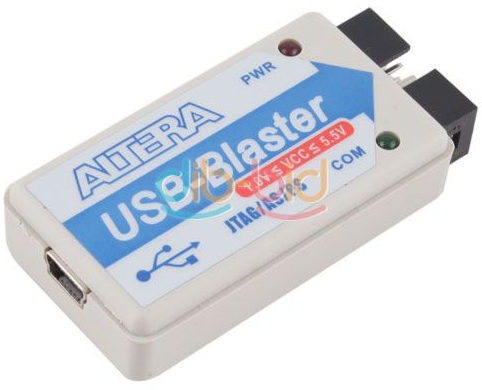
All boards and the programmer, you can easily get through eBay: link1 and link2 and link3.
The next step - directly connect wires pins, according to the scheme: 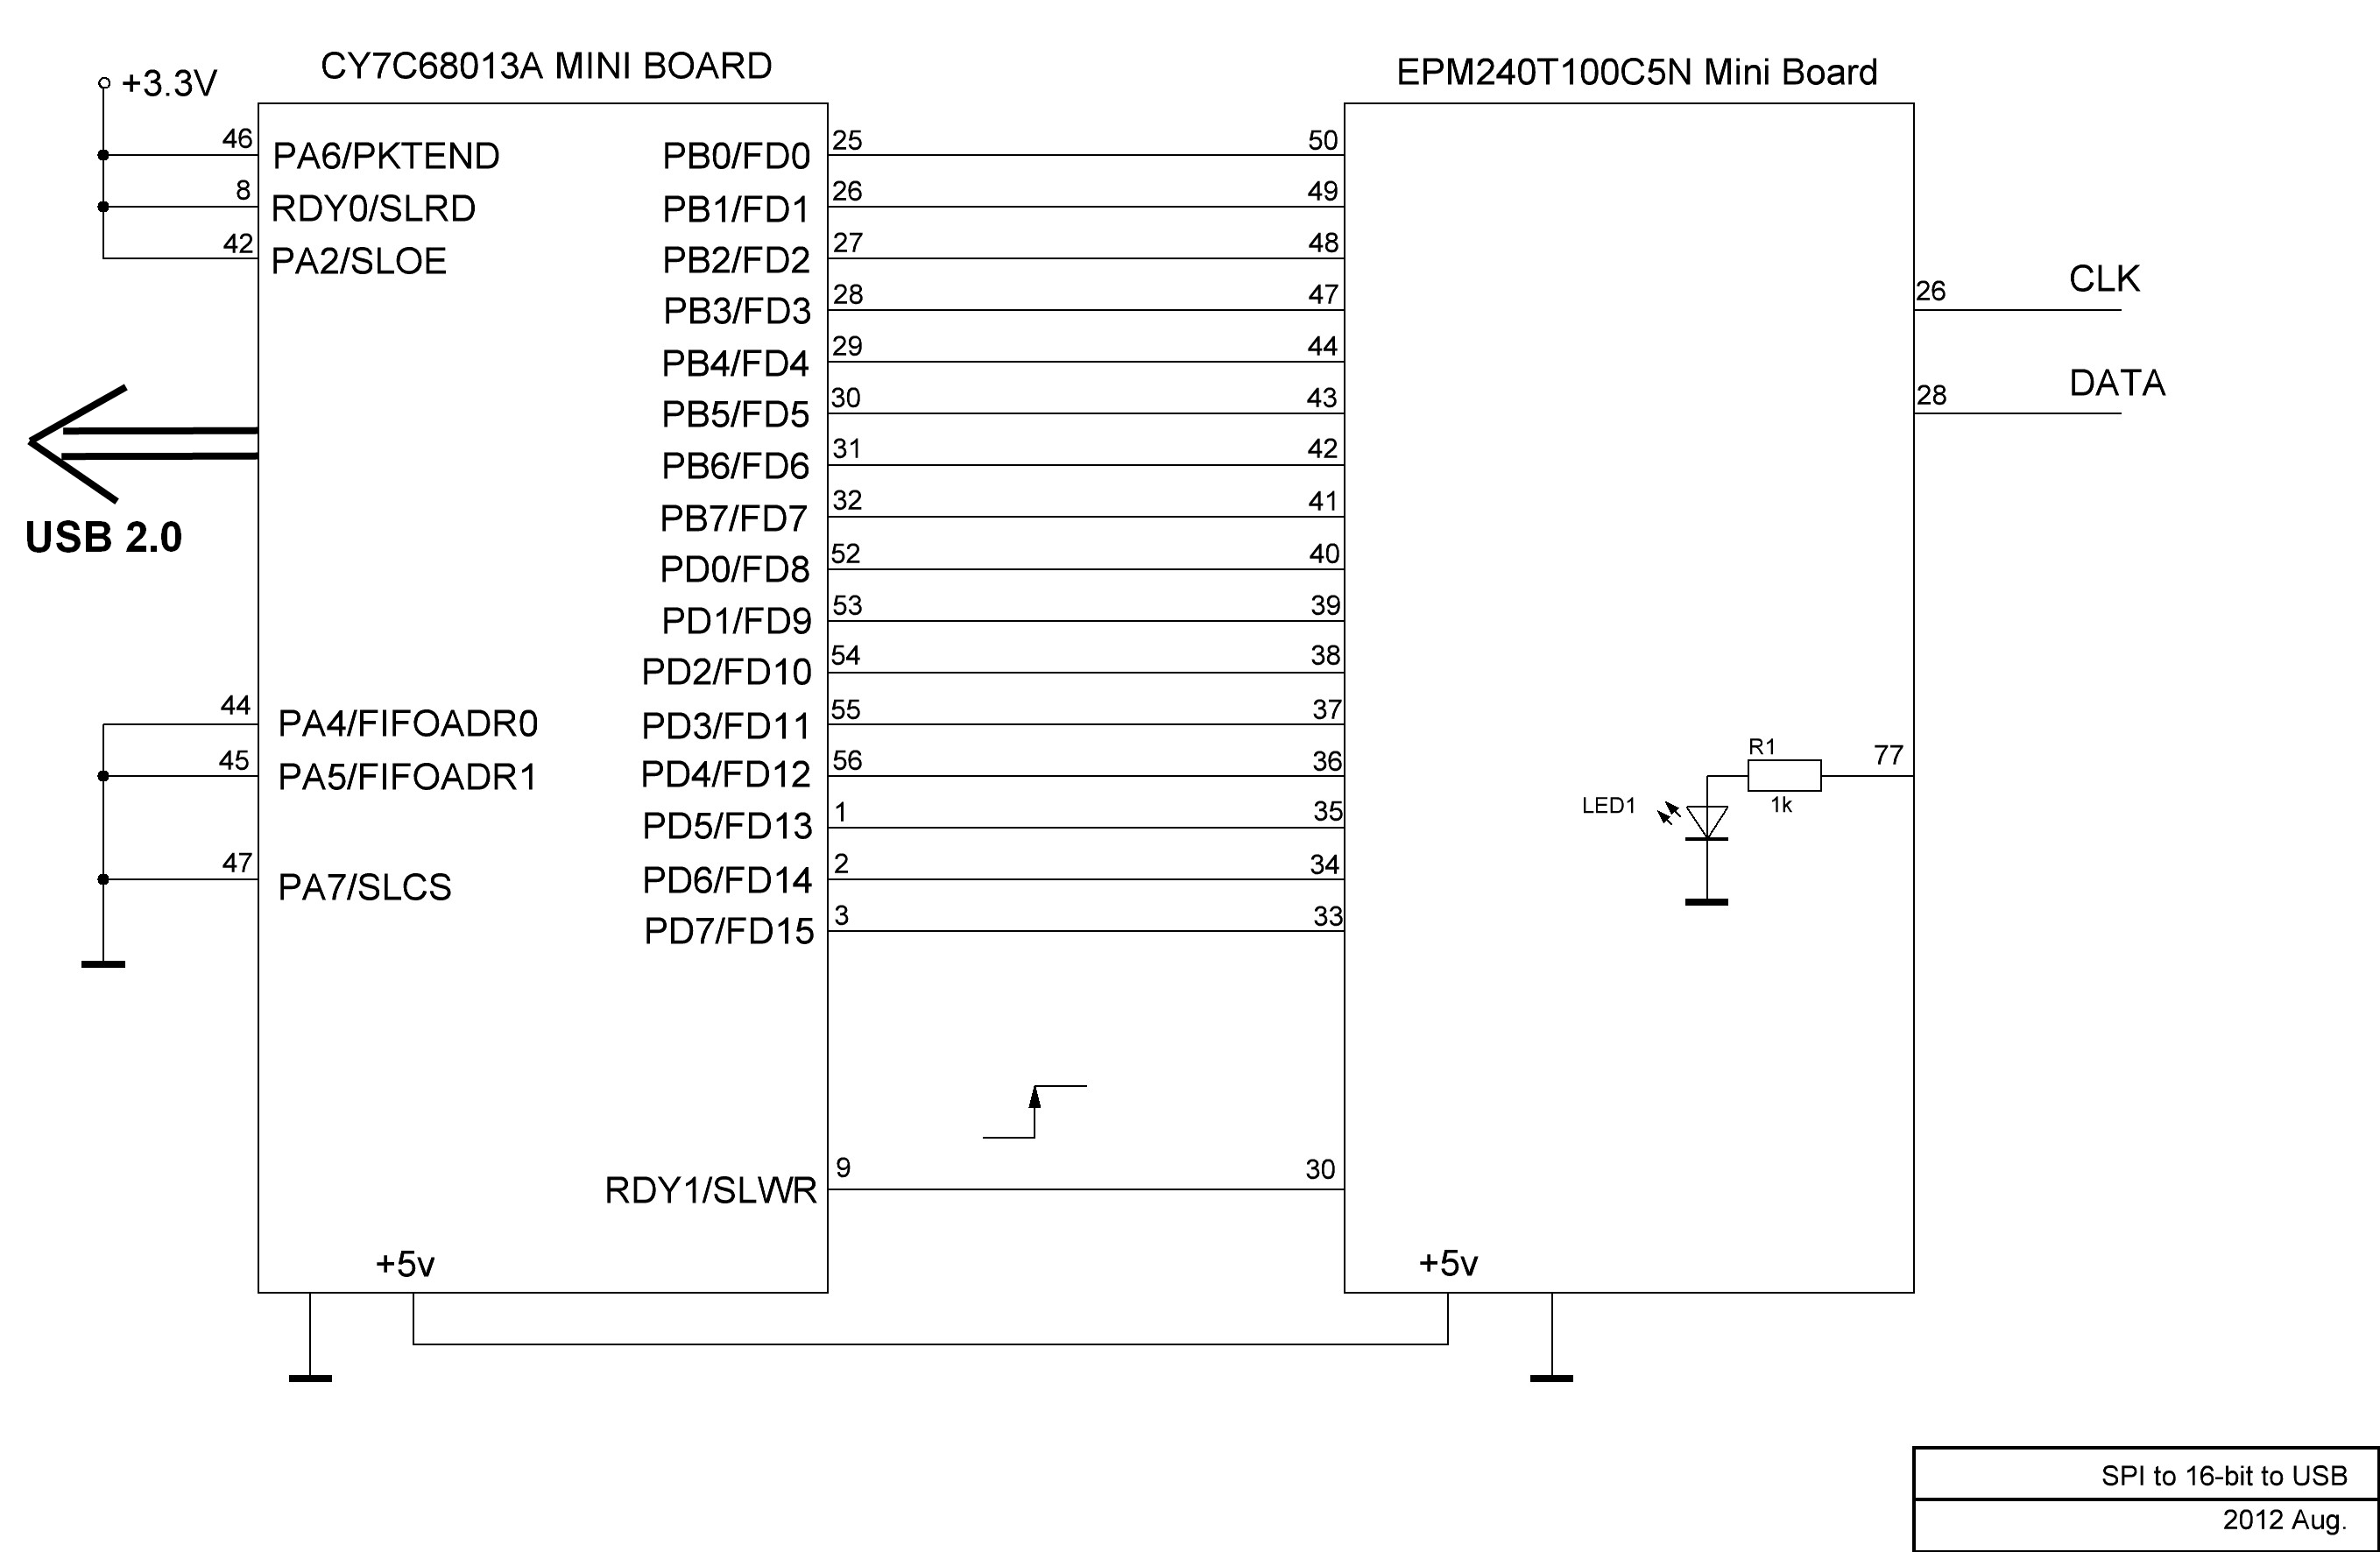
Programming CY7C68013A:
1. Remove the short circuit switch with EEPROM, connect board to USB and press power on: 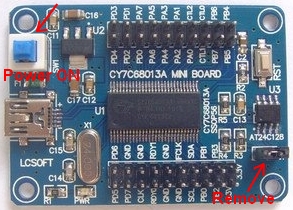
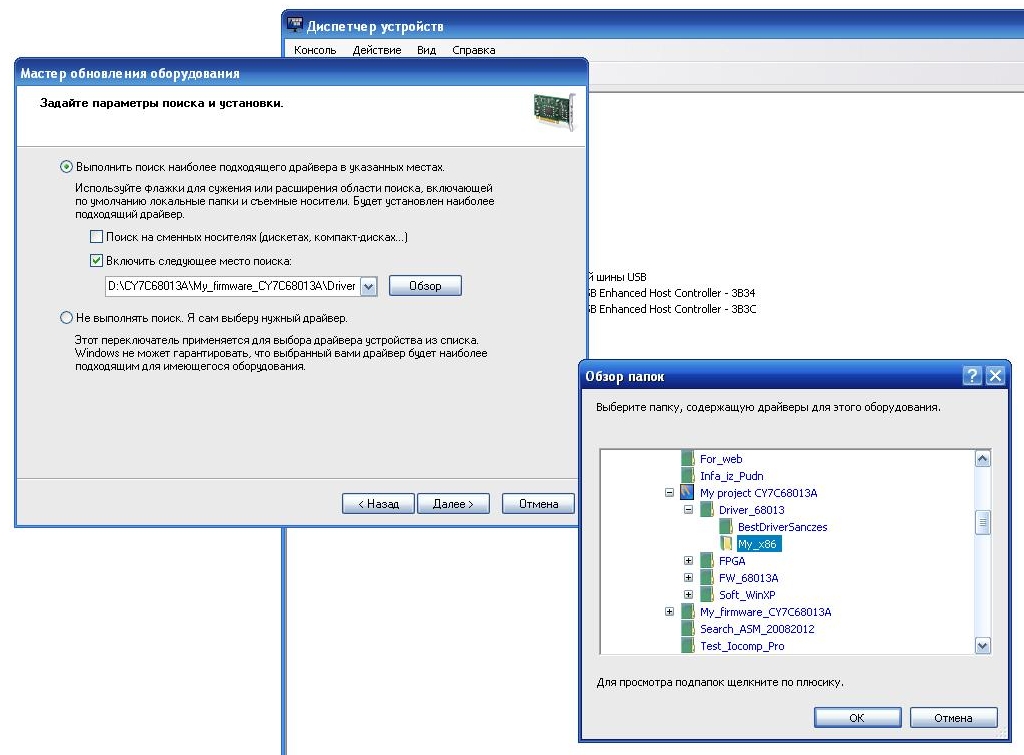
2. Power ON, and next - you need to install drivers for Windows:

3. Please specify the path where are the driver:
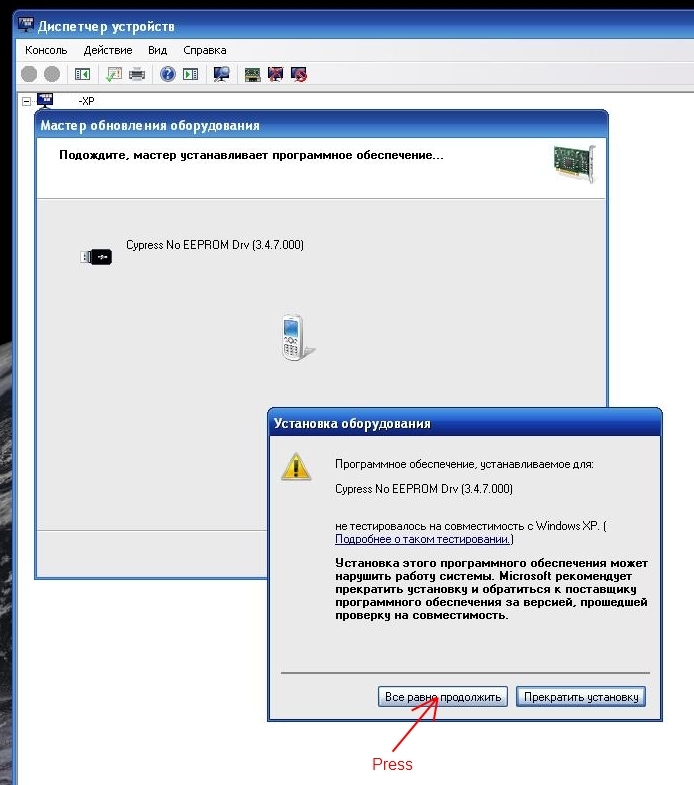
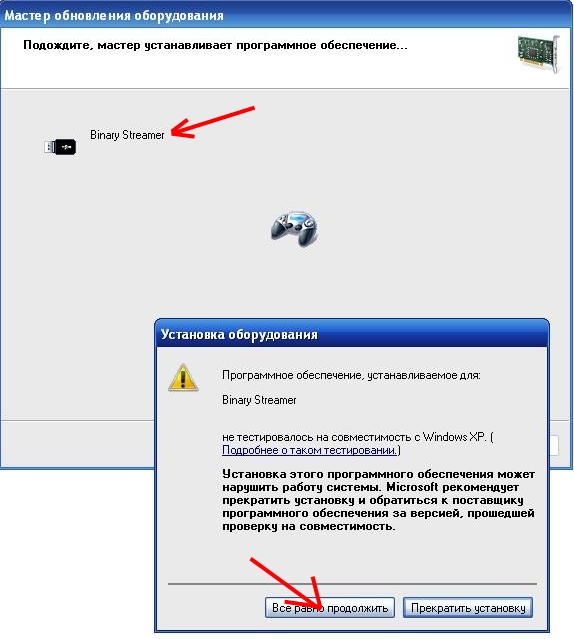
4. Continue anyway:
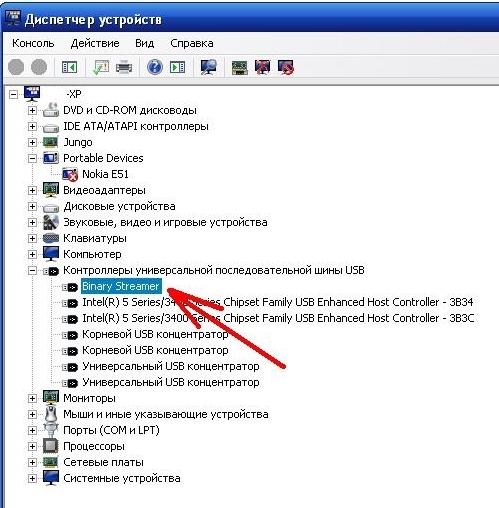
5. After succesfully installed driver, re-connect board to USB. In Device Manager, you should see: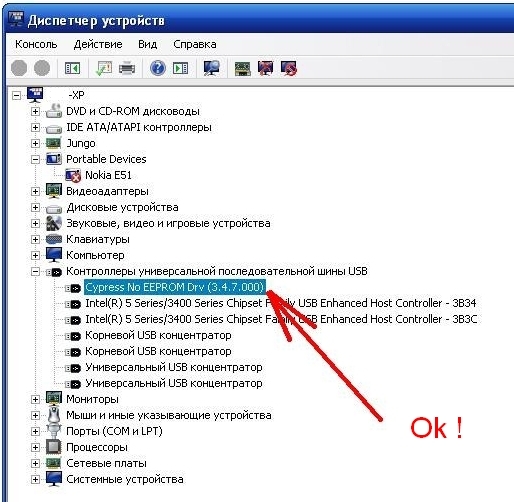
6. For next step, needed install Cypress Suite USB 3.4.7 pack, and run CyConsole: 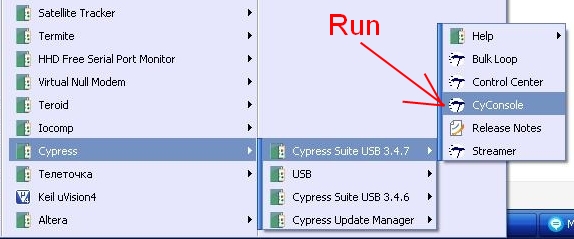
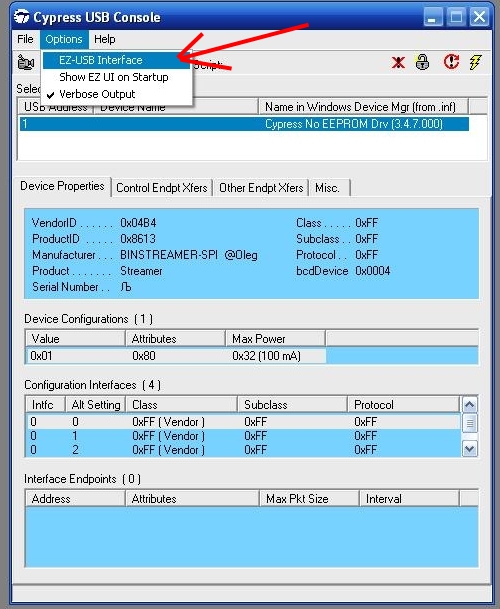
7. In CyConsole -> Option ->EZ-USB Interface:
8. Set the short circuit switch on EEPROM 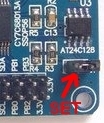
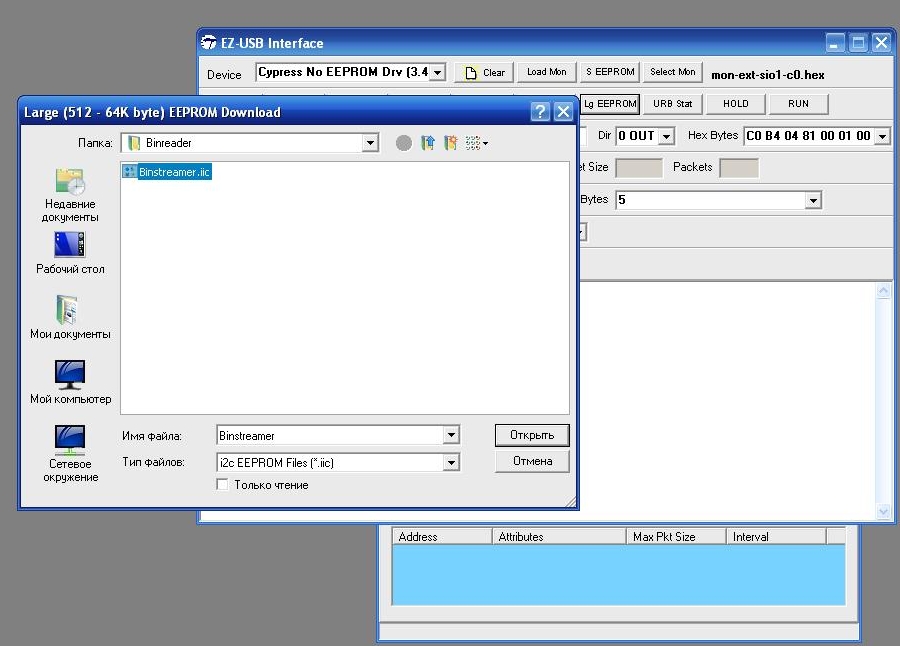
9. Press Lg EEPROM:
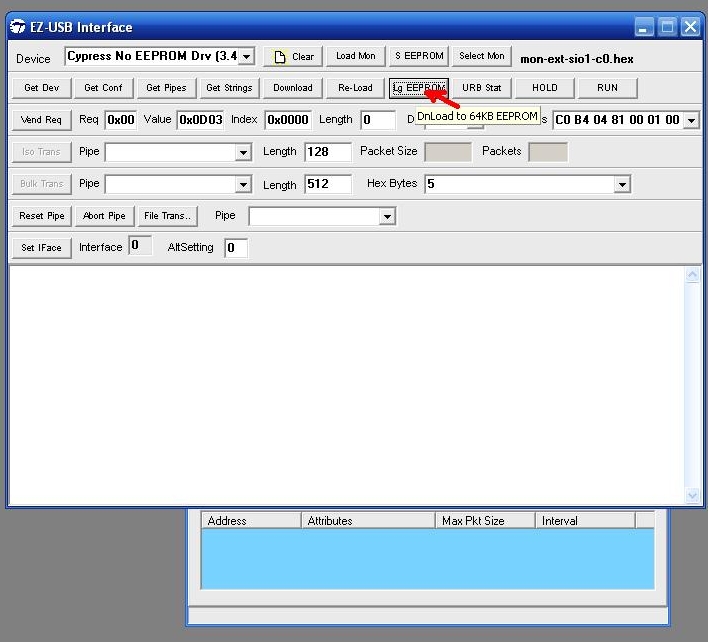
and specify the path to the file Binstreamer.iic , press Open:
10. Disconnect and connect board to USB. A message appears of finding a new device "Binary Streamer" and need to install the driver by specifying the path to the driver.
11. After successfully installed we can see other devices connect to USB. This is the final stage.
Programming EPM240T100C5N:
1. First you need to install the software Quartus II v. 9 or higher.
2. Connect the programming device to the computer, you must install the driver by specifying the path:
....\ALTERA-QUARTUS9\90\quartus\drivers\usb-blaster\x32
In Device Manager see: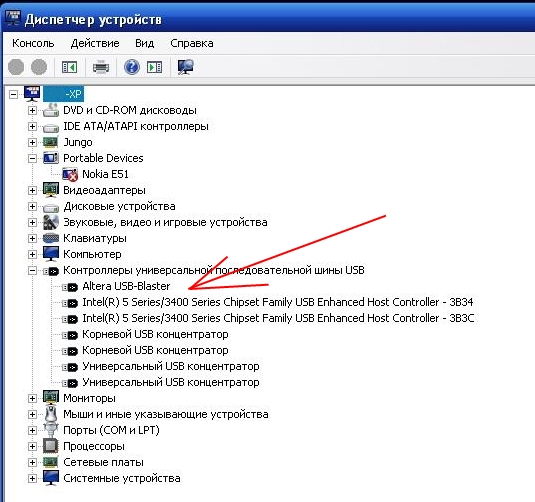
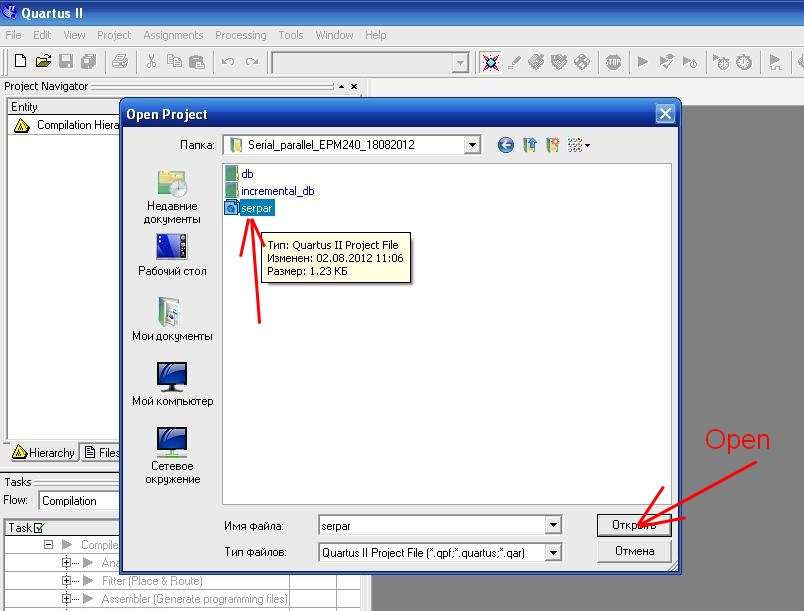
3. Run Quartus II and open project Serpar:
4. Connect the board EPM240 to the programmer. Power On the board. In Quartus: press Tools -> Programmer:
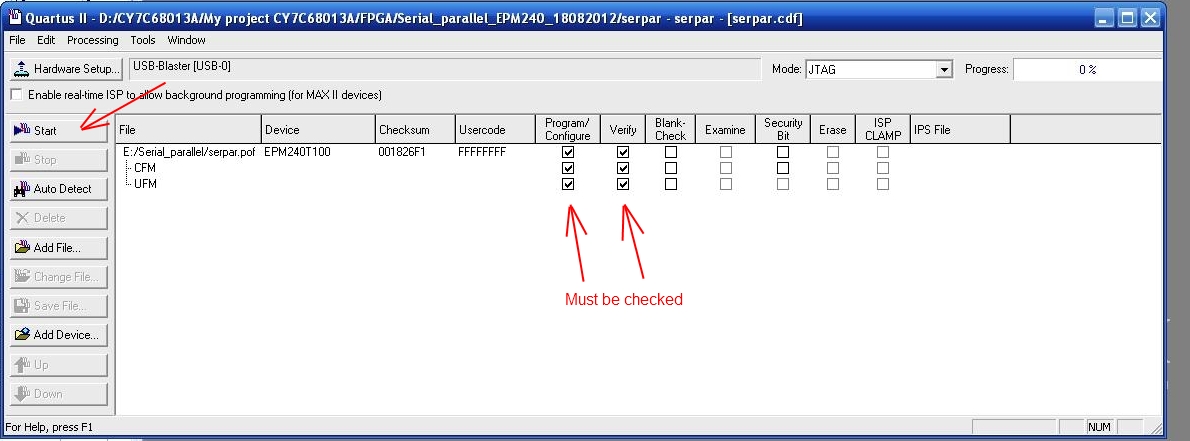
5. Press Start. The progress bar shows the programming status. Report of successful programming will be shown in Quartus. This is the final stage.
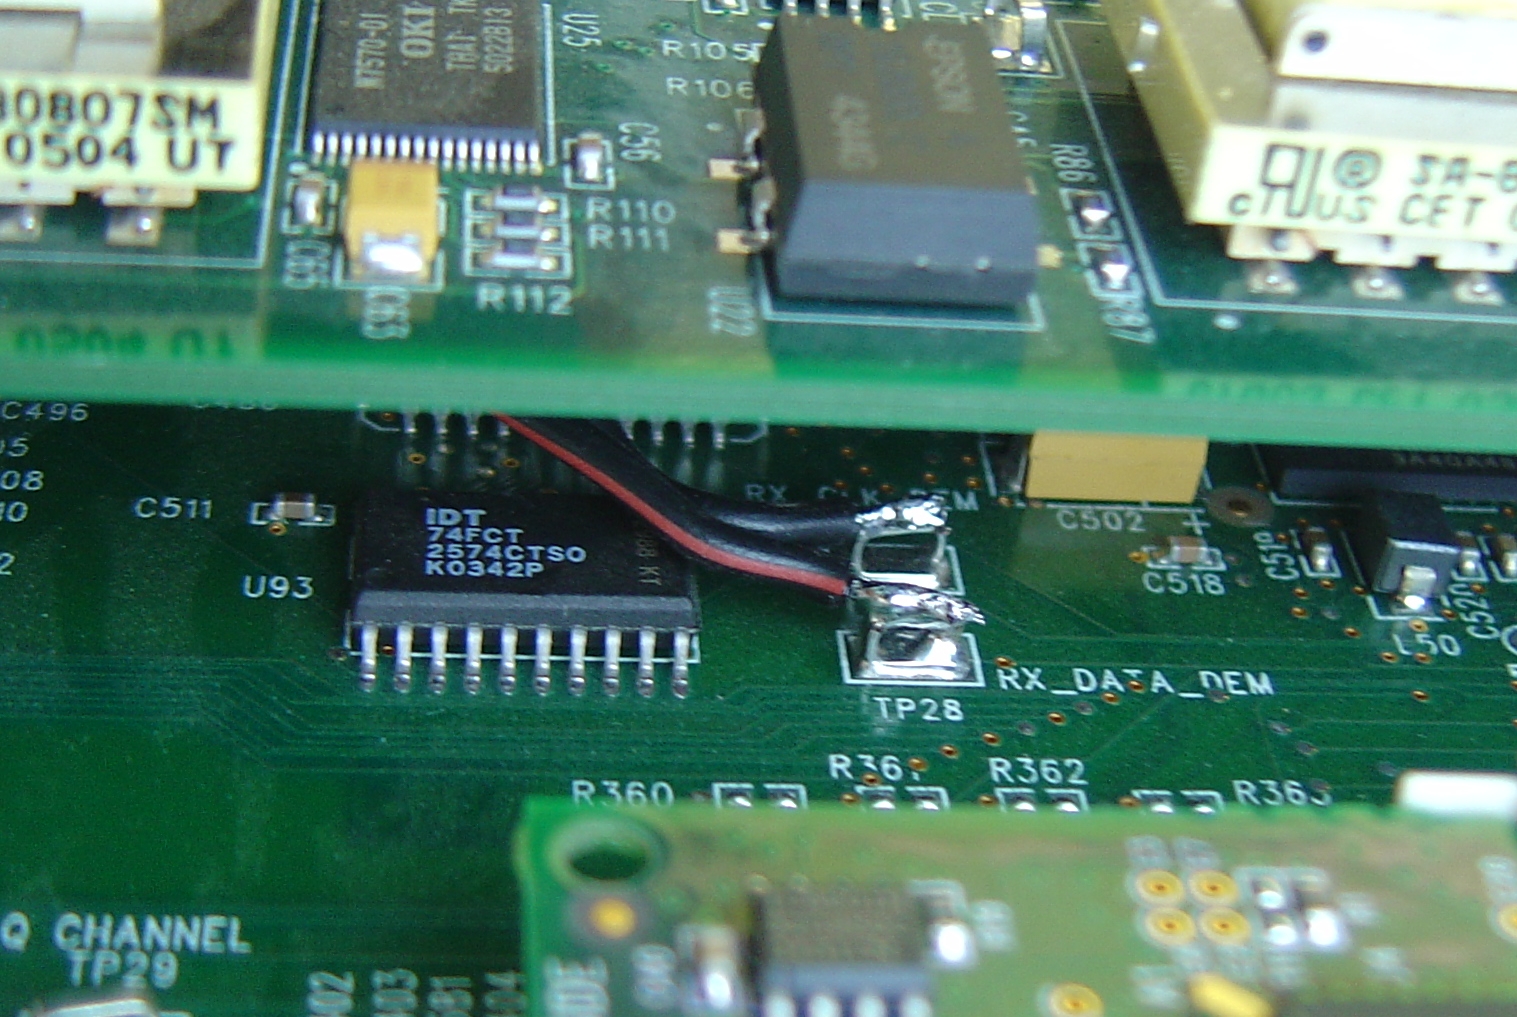
Connecting Binstreamer to SLM-7650 modem:
For connection necessary: connect the CLK pin Binstreamer to RX_CLK_DEM pin modem, and also connect the DATA pin Binstreamer to RX_DATA_DEM pin modem.
Merge ground wire. Powered via USB (+5v).
Fully assembled:
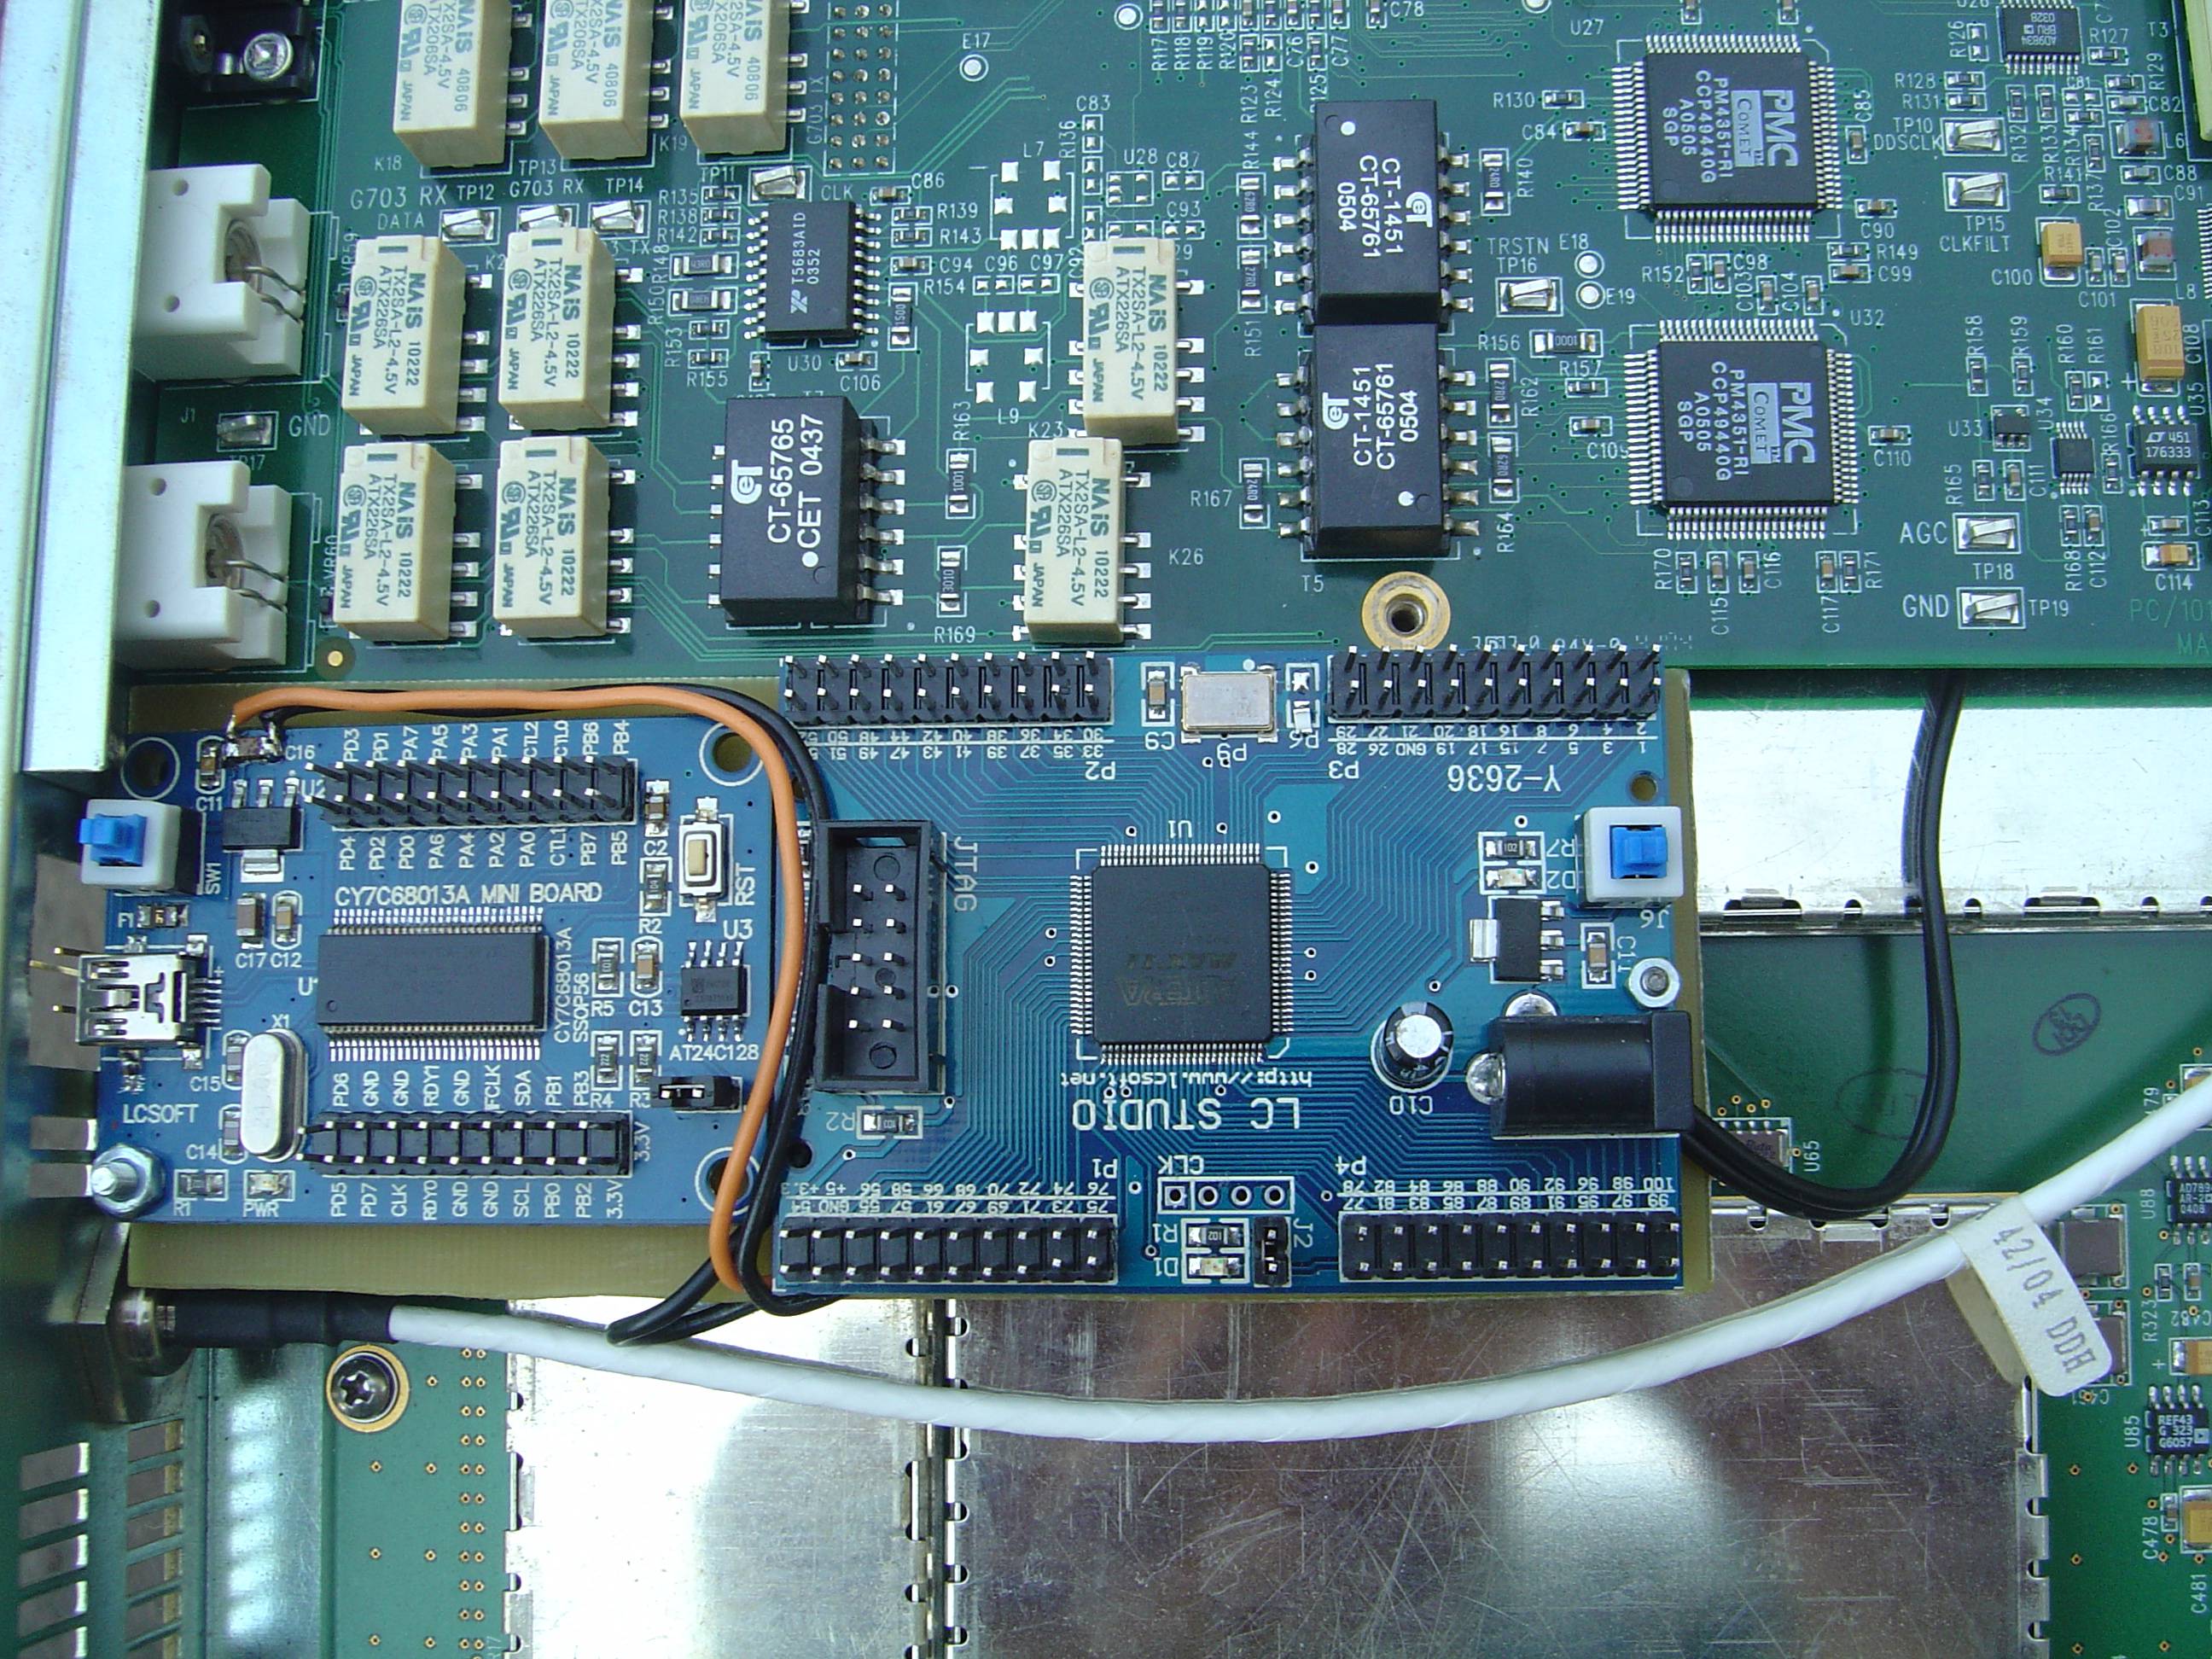
Flashing LED on the FPGA board, indicates the presence CLK strobes.
Software for Binstreamer:
I wrote software called Binreaders. Download here >>>.
If all the settings to the controller CY7C68013A are correct, and properly installed the driver, then after starting Binreaders we will see:
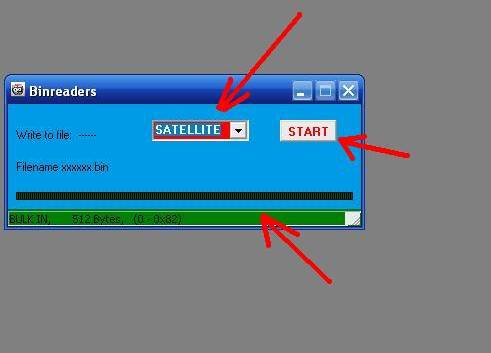
Should be active Start button and choose satellite window.
The green field at the bottom shows the controller and driver ready to record data.
Select satellite and press Start....
For testing, I wrote down the serial data with a frequency CLK of 24.5MHz. Recording without problems.
I think that you can record and at a higher speed, but I have not tested it, because I do not have a data generator with a higher frequency > 24.5MHz.
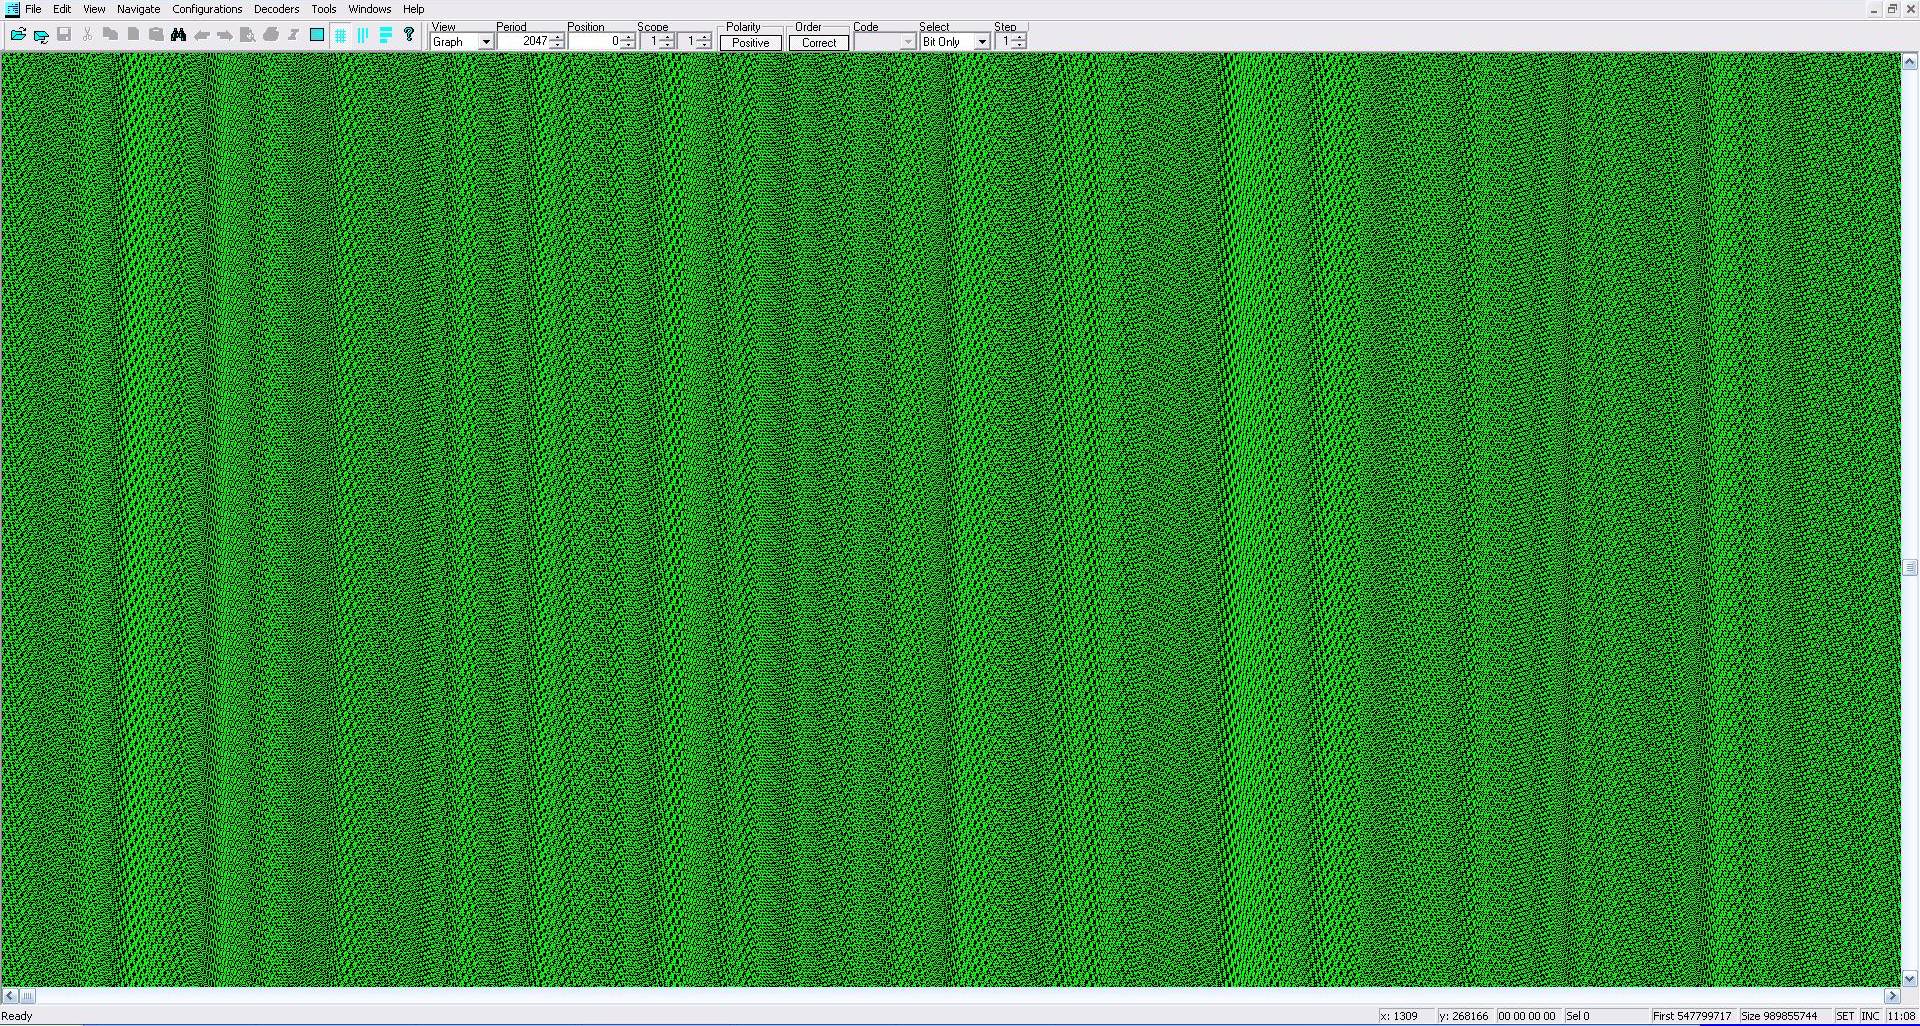
If you activate the self-test on the modem you can write a test pattern. For example, recorded 2047-bit pattern at QPSK 3/4 and 15000 kbps :
And the successful reception of weather satellite MetOp-A and Electro-L1:
 ________
Settings for SLM-7650 modem:
FunctionSelect--->Utility---->Demodulator
| Item | MetOp-A, -B | FY-3A, 3B, 3C | Meteosat-10 and Electro L1 | |
|---|---|---|---|---|
| 1 | ReceiveFilter Input RX-A,B,C,D,V |
RX-A QPSK 3/4 Rate=3500.000Kbps |
RX-B QPSK 1/1 Rate=5600.000Kbps |
RX-C BPSK 1/2 Rate=146.941Kbps |
| 2 | Demodulator Type | INTELSAT OPEN | INTELSAT OPEN | INTELSAT OPEN |
| 3 | DecoderType | Viterbi | Viterbi | Viterbi |
| 4 | RX BPSK Ordering | NON-STANDART | NON-STANDART | NON-STANDART |
| 5 | Demod Spectrum | INVERTED | INVERTED | INVERTED |
| 6 | RX symbol rate | 2333.333Ksps | 2800.000Ksps | 293.882Ksps |
FunctionSelect--->Configuration--->Demodulator
| Item | MetOp-A, -B | FY-3A | FY-3B | Meteosat-10 and Electro L1 | |
|---|---|---|---|---|---|
| 1 | RX-A,B,C,D,V | RX-A | RX-B | RX-B | RX-C |
| 2 | RX-IF Frequency | 147.805000MHz | 151.033000MHz | 151.017000MHz | 137.500000MHz |
| 3 | Descrambler Type | IESS | IESS | IESS | IESS |
| 4 | Descrambler | OFF | OFF | OFF | OFF |
| 5 | DiffDecoder | OFF | OFF | OFF | OFF |
| 6 | IF Loop Back | OFF | OFF | OFF | OFF |
| 7 | BER Threshold | NONE | NONE | NONE | NONE |
| 8 | SweepCenter | 0 Hz | 0 Hz | 0 Hz | 0 Hz |
| 9 | SweepRange | 70000 Hz | 70000 Hz | 70000 Hz | 70000 Hz |
| 10 | Reacquisition | 0 sec | 0 sec | 0 sec | 0 sec |
-------------------------------- Added 1 Sept 2012 ---------------------------------
-------------------------Update 1 Oct 2014-------------------------